8-way Chip Adapter Installation Instructions
Click on any photo to see a larger image. Pictures should appear in a new browser window.
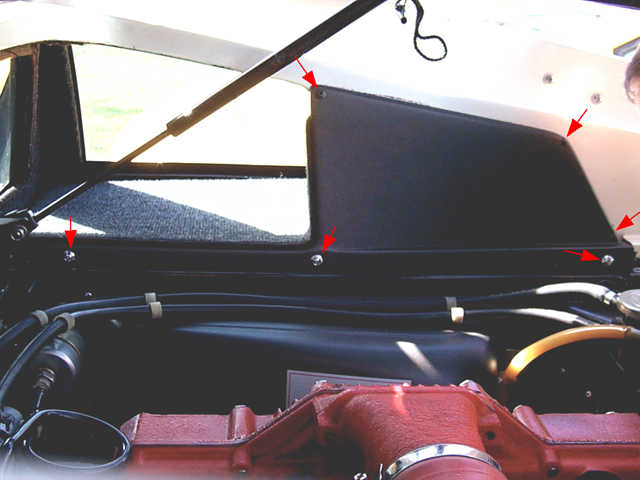
Before starting the ECM removal, disconnect the negative battery lead from the battery. Remove the engine cover, then remove the six screws securing the carpeted trim panel from the right side of the engine bay. Some cars may be missing one or more screws.

Carefully remove the trim panel by pulling it sideways then lifting slightly upwards.
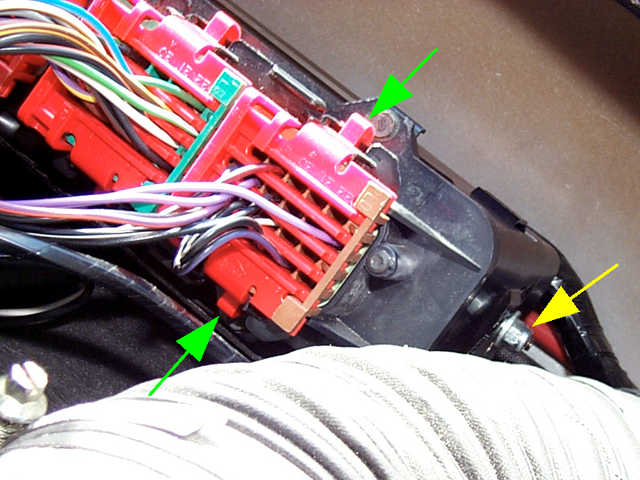
Locate the two nuts, each securing one side of the ECM to its bracket (yellow arrow). Loosen, but do not remove the nuts from their studs. If the ECM is to be removed from the car, squeeze the connectors as indicated by the green arrows and wiggle all four of the connectors free. Lift the ECM upwards to remove it.

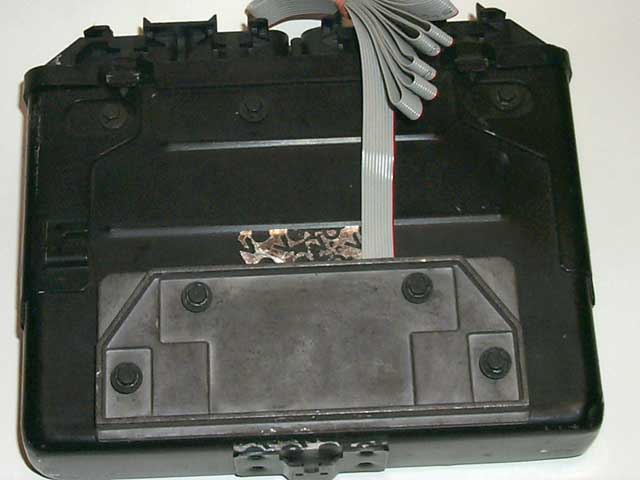
Locate the access panel on the bottom of the ECM and remove the four screws using a 1/4" nutdriver. If the ECM has never been serviced, there will be one or two pieces of anti-tamper tape along the edges. Slit this tape to gain access. A flat-bladed screwdriver may be needed to pry the cover off.
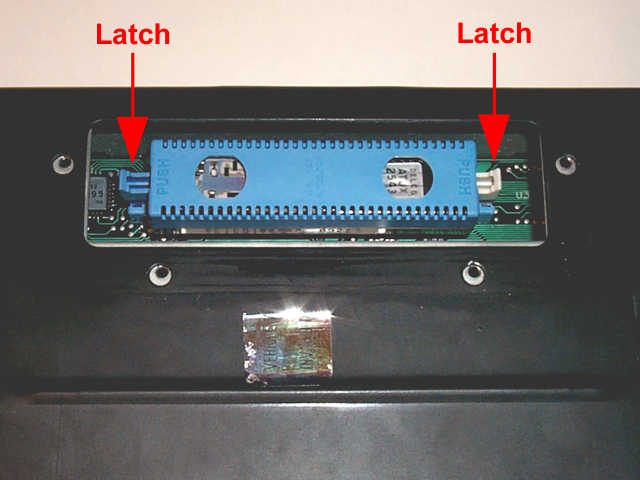
The memcal is the blue object pictured above. To remove it, press down on the latches as indicated above...

As the latches move outwards, the memcal will pop out of its socket.
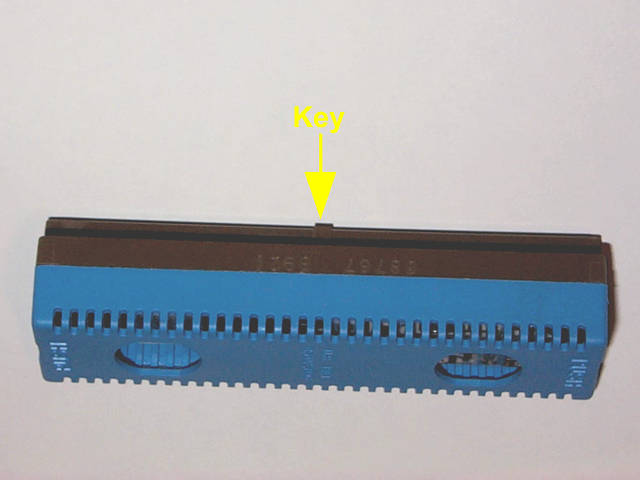
Note the small bump, or key, along one edge of the memcal socket.
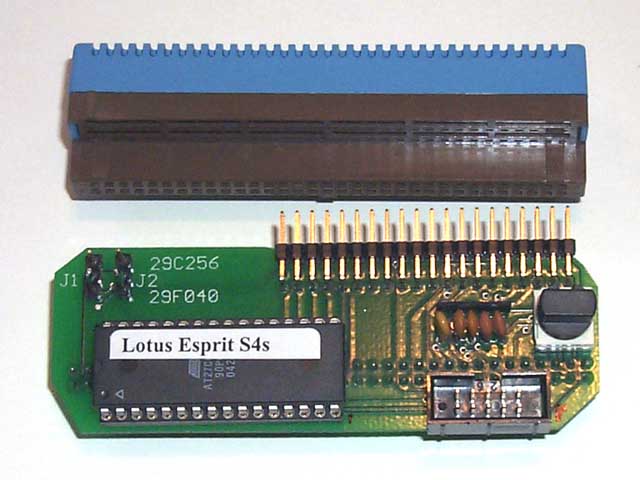
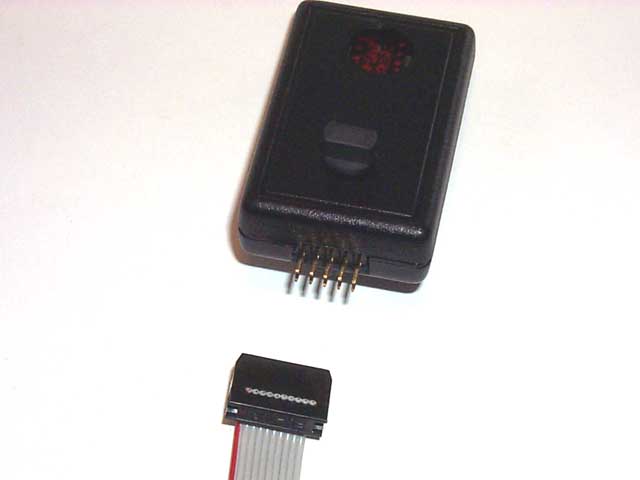
Install the memcal carefully onto the 8-way chip adapter as shown, being careful not to miss or bend any pins on the adapter plug. The last pair of pins should align with the last pair of holes, as shown at the right side of the photograph.
The memcal should be seated firmly all the way onto the adapter, such that the pins are no longer visible.

Note also that the key on the memcal faces downwards. . .

and observe that the label on the memcal chip is located at the same end as the chip on the adapter board.
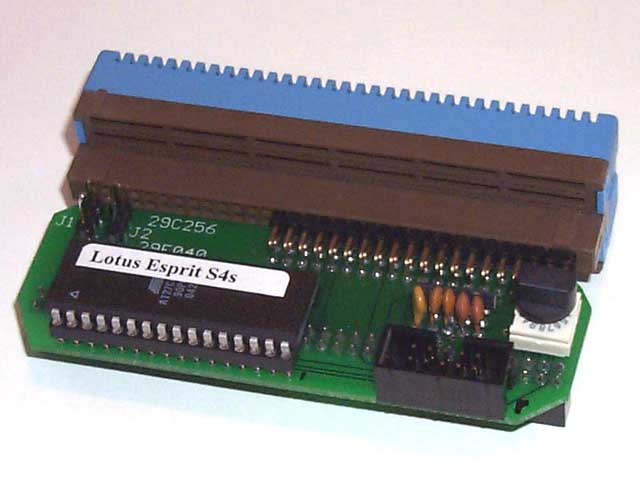
Insert the ribbon cable into its socket as shown, it should only fit one way. Make sure the rotary switch at left is set to "0".

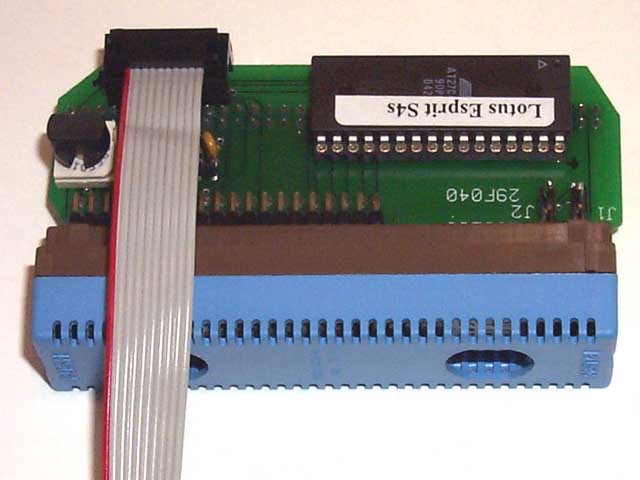
Carefully angle the assembly into the ECM as shown.
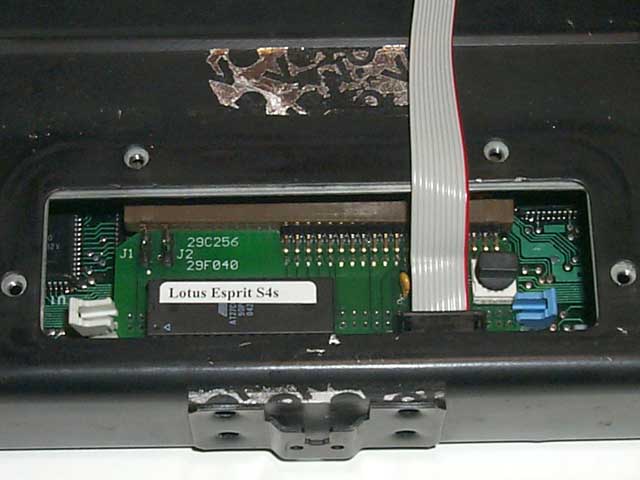
Align the adapter plug with the ECM socket and press firmly into place, ensuring that the latches are closed.
Reinstall the cover with the ribbon cable exiting as shown. Be gentle when tightening the screws.
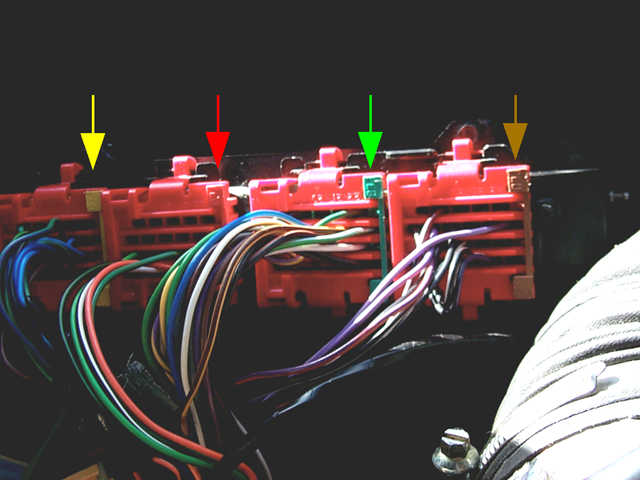
Reinstall the ECM into the car, being careful not to dislodge the mounting studs/nuts. The flat washers should be fitted between the mounting bracket and the nuts. Reconnect the four plugs, noting that they are color coded as shown.
Route the ribbon cable to a convenient location, usually in the interior. This is probably the most difficult aspect of the installation.
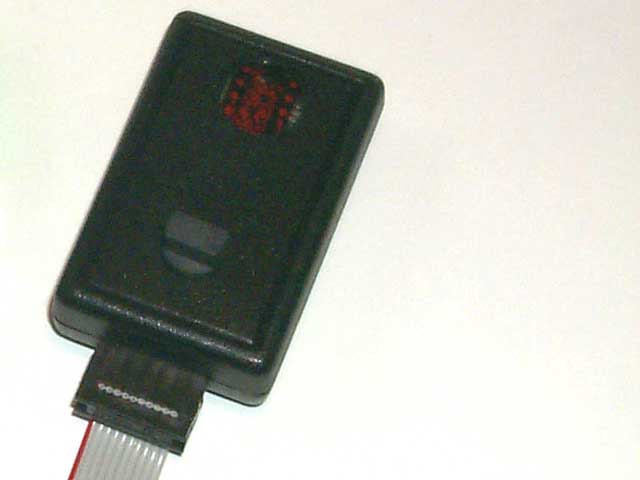
Plug the ribbon cable into the remote switch as shown, noting that it is possible to connect it backwards. The red stripe should be to the left when the knob and display are uppermost.
Carefully reinstall the trim panel, being sure not to tighten any of the screws until all of them have been started. Reconnect the battery and start the car. There should be no Check Engine light, and the display should illuminate with a number between 0 and 7..
The switch positions and their corresponding programs are shown at right. The displayed program numbers correspond with the chip numbers as shown on the Lotus Esprit World and Marcus' P.U.K. Esprit Racing websites, with the exception of program "0".
Copyright ©2000-05 by Sanjaya Vatuk
Updated on 01/09/05